Creating a personal VPN using AWS
29 Mar 2020 | categories: blog
prev: git bisect | next: EC2 VPN script
I was reading a thread on Slack recently and someone was asking what VPN people use, I recently stopped paying for Tunnelbear so I was interested to see what else was out there. Someone half way down the thread mentioned they use an AWS EC2 instance as a personal VPN and I had no idea such a thing was possible, though in hindsight it makes complete sense.
Although I hadn’t known such a thing was possible as soon as I read that message it was obviously something that anyone who knows a little about computers and AWS should be able to set up. So I did just that, I created myself an EC2 instance to use as a VPN and I then wrote a simple bash script to help me set up and tear down my instance in order to save money. My next post will be about that script I wrote, this one will be purely about setting up an EC2 instance for use as a VPN. Anyway speaking of money…
The running costs of a t2.micro EC2 (Elastic Cloud Compute) instance is, as of the time writing, $0.0114 per hour which works out around $99 a year. Not too shabby for a VPN. AWS does already offer a VPN service but a quick glance at their pricing guide and it’s five times as expensive per hour and you are charged for the amount of data you use. No bueno.
set up
Seeing as I’m a cheap fuck and I like tinkering with things let’s run through how we would set up a VPN ourselves to save some bread. The prerequisite here is having an AWS account, go sign up if you haven’t already. There is a “Free Tier” which you can make use of for the first 12 months so you have nothing to lose trying this out.
choosing an image
Sign yourself into AWS and navigate to the EC2 service console, we need to launch ourselves a new instance. Click the big blue “Launch Instance” button.

This will land you in the AMI (Amazon Machine Image) selection page, an AMI is just a ready made image you will use as the basis for your instance, go ahead and select the latest Ubuntu version, the default architecture will do just fine. The AWS Overlords have deemed this image worthy enough of the free tier, so that’s nice.

choosing an instance type
The instance is just the size of the machine you would like your EC2 instance to run on, let’s stick to the t2.micro because 1. It’s free tier, and 2. We are running a VPN not running some public app that’s serving 700 requests per second. A small instance will do the job.
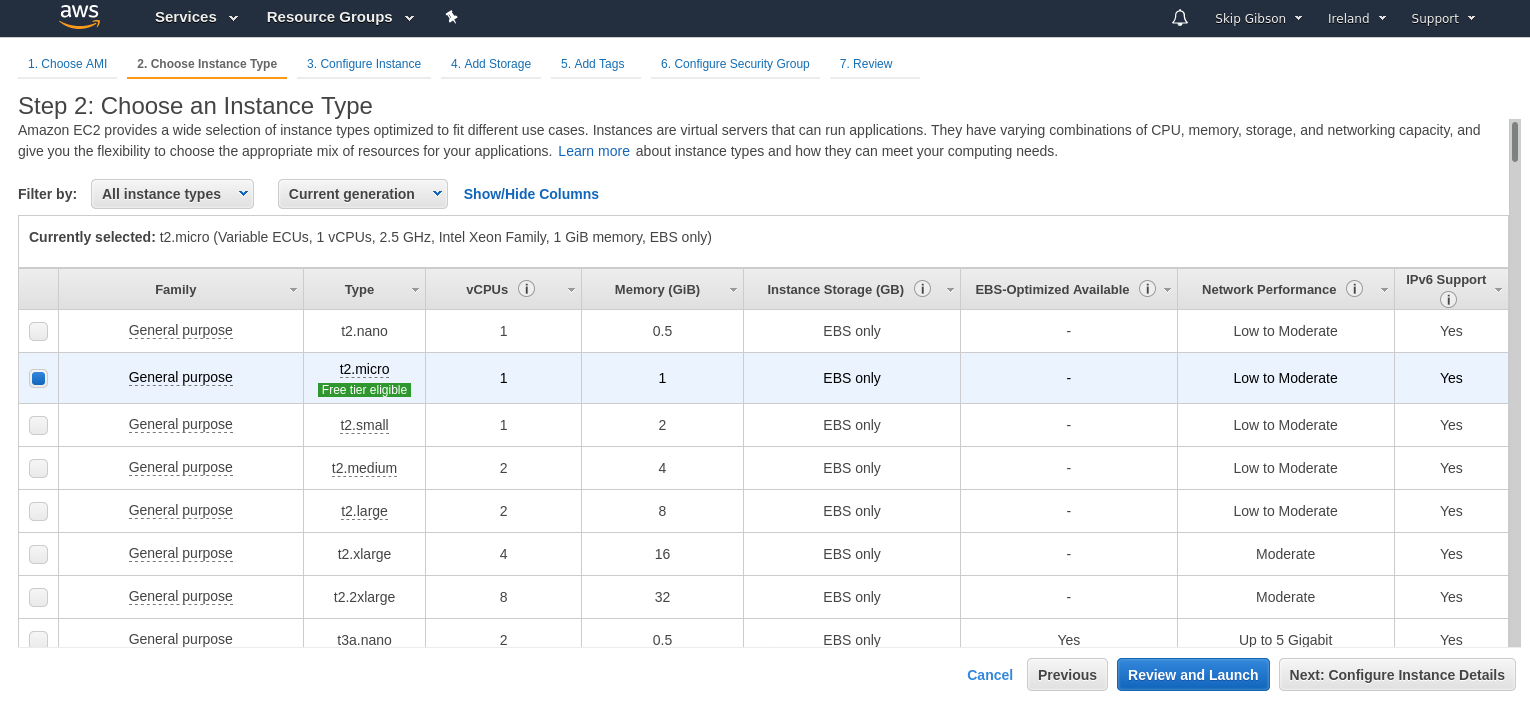
Click “Review and Launch” to proceed (see, isn’t this a piece of piss)
editing security groups
If you’ve been following along you should now be at a review page for your instance, but we aren’t done we need to open up some ports. Click on the “Edit security groups” link.

AWS runs on the premise that everything is locked down unless you specifically give permissions for something to be done. For example in the security group only port 22 is open, this is the port SSH uses and will allow you to get into your instance when it is up and running.
We will be using OpenVPN so we need to open the correct ports for OpenVPN to listen on, OpenVPN’s official port is 1194 and it can do its thing through port 1194 using either TCP or UDP. UDP is generally preferred but let’s allow the port to accept both protocols.
Your security group should look like this.

Click “Review and Launch” to bring you back to the view screen.
generating new keys
When you are ready you can click “Launch” and you will be presented with a modal asking you if you want to select an existing key pair or generate a new one.

Let’s create a new pair, give them a name that you will understand later like “VPN keys”. These will be used with SSH later to authenticate you and grant you access to your running EC2 instance
Download your keys file and then click “Launch”. Your EC2 instance will now be spun up for you so let’s navigate back to the EC2 Instances page and see what’s going on.
your public IP
If you managed to find your way back to the EC2 Instance console you will see your instance running, if you select it you will see a whole bunch of information about it in a panel just below. You can drag the panel up to make it bigger.

I have blurred out all (I hope) of my information and highlighted where the public IP address is. This is the IP address you will use to SSH into your instance and do some final set up, make note of it.
ssh keys
We need to take the keys you generated and downloaded earlier and store the
.pem file safely in your .ssh folder.
- Move the key to your
.ssh/folder with the rest of your SSH keys. - Change the permissions for security.
- Use
ssh-addto add the key to your key chain.
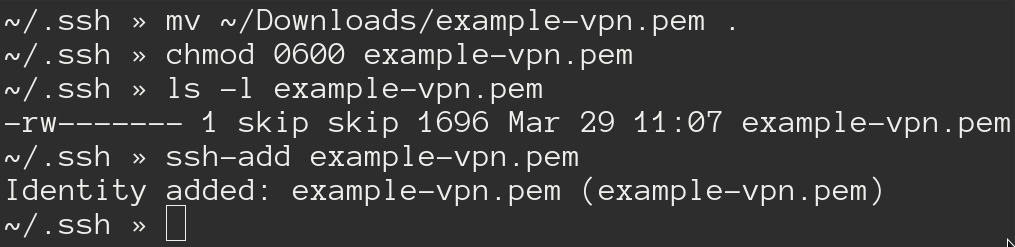
With that out of the way you should be able to run ssh ubuntu@<your-public-ip>
and connect to your running EC2 instance.
setting up openvpn
To save time we can use an install script from https://git.io/vpn to download and configure OpenVPN for us. Feel free to do this manually if you don’t trust the script.
Run sudo apt-get update && sudo apt-get upgrade -y to download and apply any
updates. I won’t show you a screenshot of my terminal but you’ll see it
downloading and applying upgrades.
After that has finished we need to create a vpn directory and download the
OpenVPN install script I previously mentioned. Here’s the command to download
the script:
wget https://git.io/vpn -O openvpn-install.sh
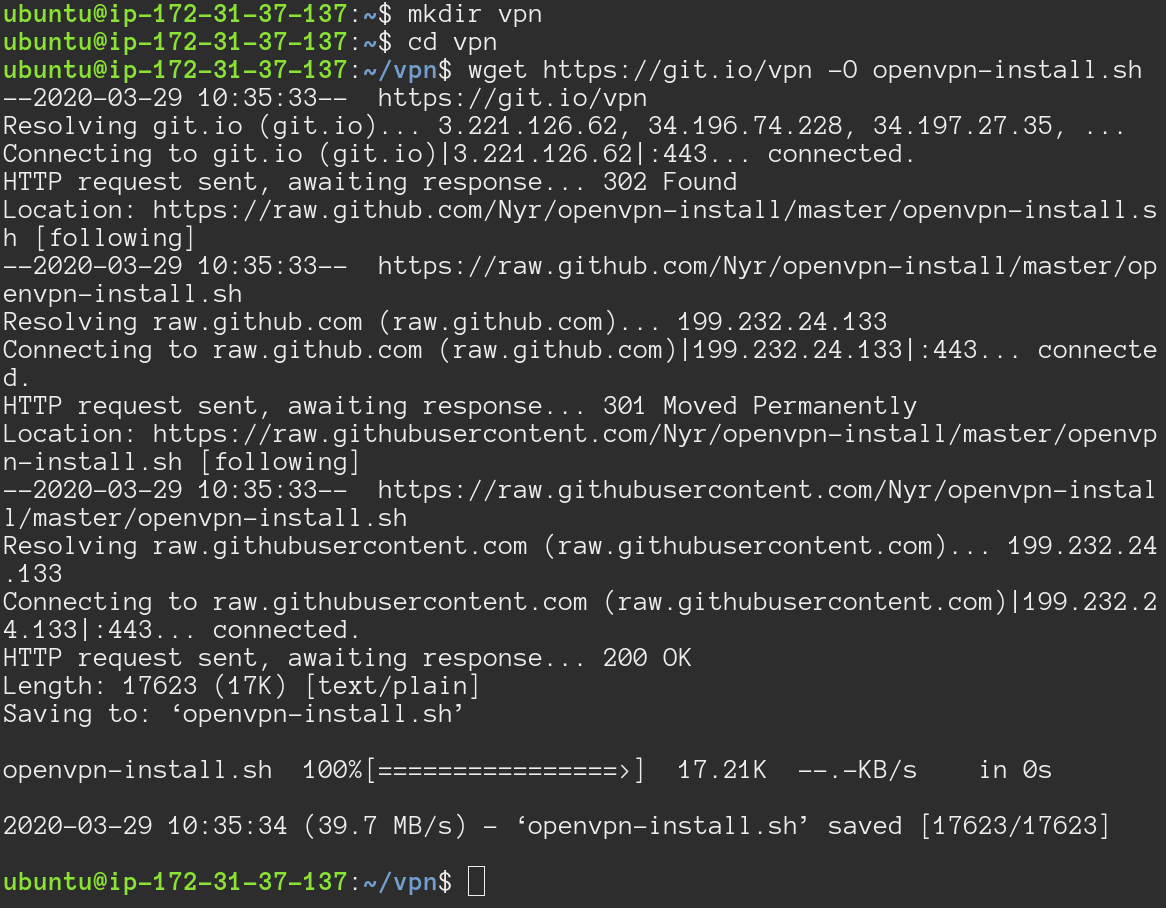
Make the script executable and run it.

The script will ask for some configuration but you can just hit enter to let it use the defaults.
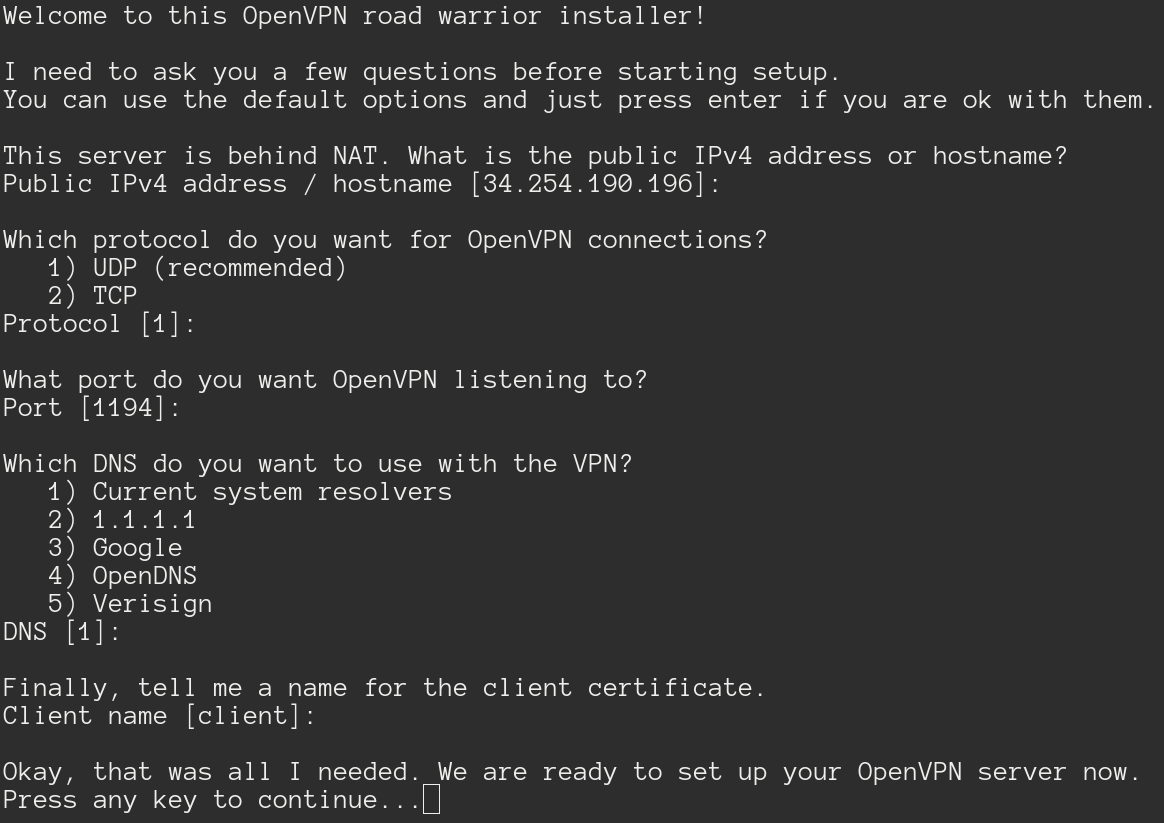
When it has finished it will tell you where it has stored the generated .ovpn
file, for me it has been stored here /home/ubuntu/client.ovpn. You can
download this file and use it with OpenVPN on any system to connect to your
running instance.
The last step here is getting your ovpn file off your instance and onto your
machine, use scp on your local terminal and the public IP you used to SSH into
your machine to securely transfer the file.
![]()
running openvpn on linux
The following instructions will be Linux centric because that’s what I am
running (specifically a Debian flavour). Having said that if you’ve got the ovpn
file it can be used on any system just as long as you have OpenVPN installed.
First we need to install OpenVPN: run sudo apt-get install openvpn.
After that has downloaded we run sudo openvpn <path-to-ovpn-file> to connect.
You should see a lot of output from openvpn as it connects.

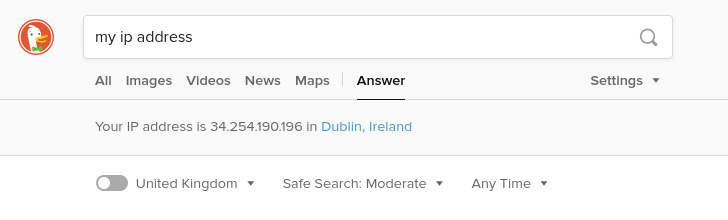
If you go to your favourite search engine and check your IP address it should say you are in whatever AWS Availability Zone you set your EC2 instance up in, for me it was Dublin.
there’s one problem
So, the ovpn file we downloaded has embedded in it the IP address of the
EC2 instance so openvpn knows where to find it. The thing is if we stop our EC2
instance we will lose that IP address and be assigned a new one when we
start the instance back up.
You could pay AWS for an Elastic IP so your instance IP address will stay static, however isn’t the whole point of this exercise to save some money?
The other option would be leave it running all the time but honestly who needs a VPN all the time. With AWS pricing you are charged by the hour so having it running all the time is just costing you.
In my eyes you have two options now:
- Stop your EC2 instance every time you aren’t using it, start it up when you
do. Taking the new IP address from your instance information, editing your
ovpnfile, then connecting
or
- Write a script that will start your instance for you, update your
ovpnfile, and connect you. Then tear it back down again when you disconnect.
I don’t know about you but that second option seems much easier in the long run, so that’s exactly what I did. I’ll walk you through that in the next post.