EC2 VPN script
26 Apr 2020 | categories: blog
prev: Creating a personal VPN using AWS | next: Untyped Constants In Go
In my last post I walked through how to create an EC2 instance on AWS that you can use as a VPN, at the end though I mentioned that unless you are paying for an Elastic IP the public IP of the EC2 instance will be different every time it is started up.
This leaves you with two choices you can either leave it running and get billed
as such. Or you could manually tear down the EC2 instance via the AWS console
and spin it up again when you want to use your VPN, take the new public IP, edit
your ovpn file with the new IP address and connect.
Not sure about you but both of those options are a bit shite, one costs money and the other requires effort. To save myself a few minutes here and there when I actually wanted to use my VPN I decided to write a bash script that automates the second option so I don’t even need to go anywhere near the AWS console.
You can find the code in my github if you fancy reading it, but for the script to work there is a little bit of set up required.
set up for the script
The task I had in front of me was pretty simple:
- Using an instance ID, pull information on the instance from AWS.
- Tell AWS to start the instance.
- Once it is up and running connect to it with OpenVPN.
- When disconnecting from the VPN tear down the instance.
To do all of the above I would need to make use of AWS CLI to query/start/stop the EC2 instance, jq to parse the JSON responses from the AWS CLI, and OpenVPN to create the VPN connection.
The thing that requires the most explanation is creating an AWS user with the correct permissions to allow the script to do what it needs to, so let’s go over that now.
AWS permissions
AWS locks its shit down. It runs with the model of no one has permissions to do anything unless you specifically give permissions, you can’t really blame them because people are careless and some are just evil.
To allow the script to work with AWS I needed to create a new user with the correct IAM policy. If you’ve ever worked with IAM you know it’s quite convoluted but I’ll walk through what I did.
creating a user
First off I moseyed on over to the IAM Users screen on AWS, in order to keep things all tidy what I wanted to do was create a new user called VPN that I would attach the permissions policy to.
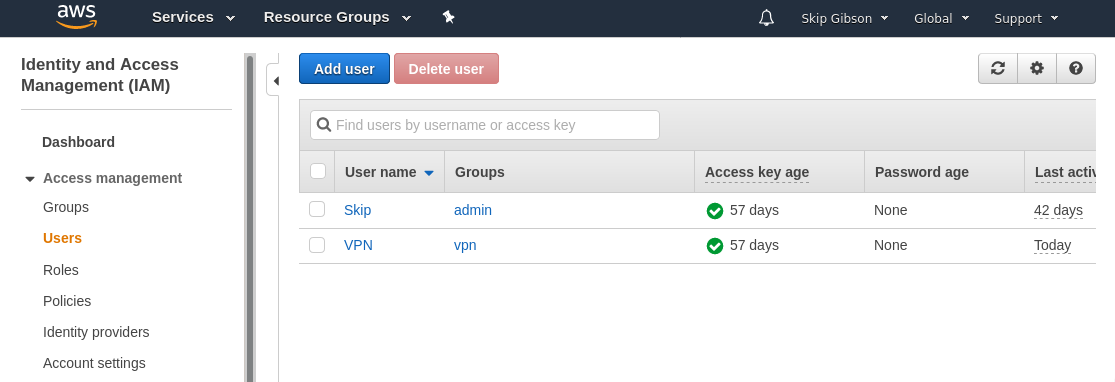
After clicking on the “Add User” button, give it a name and select the option which states this user will be for “programmatic access” AKA this user will be accessing things through the AWS CLI.

adding permissions
Moving onto the next screen this is where you set the permissions for the user, there are a few ways you can do this. You can copy an existing users permissions, set the permissions directly on the user, or create a permissions group and add the user to that group.
I felt that last option would be best, if I create a VPN group then I can add/remove permissions as I go as well as have the option to bestow EC2 permissions on other users in future.
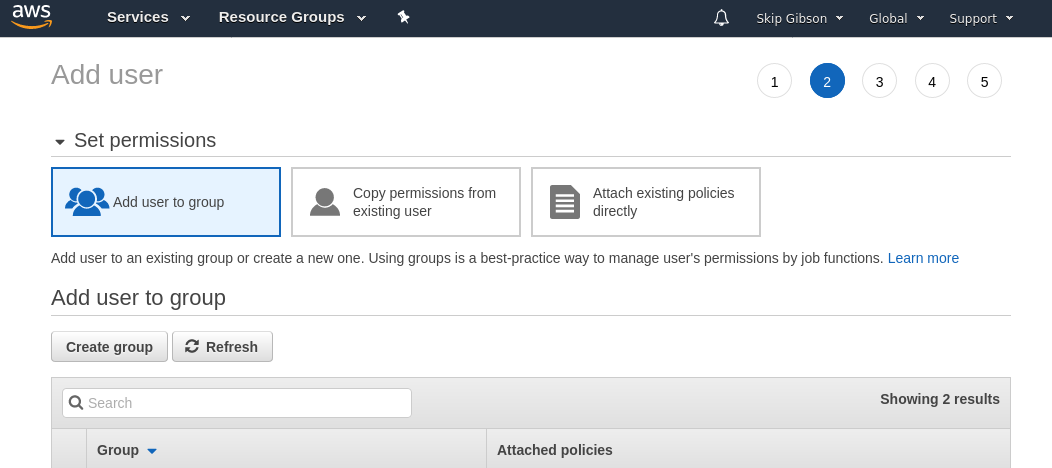
creating a group and a policy
Clicking the “Create group” button will bring up modal which needs a name for the new group and a permissions policy to attach to it, AWS gives some example policies to use but let’s create a new one.

The “Create policy” button opens up a new tab with a policy editor, if you’re insane you can write your own policy JSON by hand, or you could just use the visual editor.
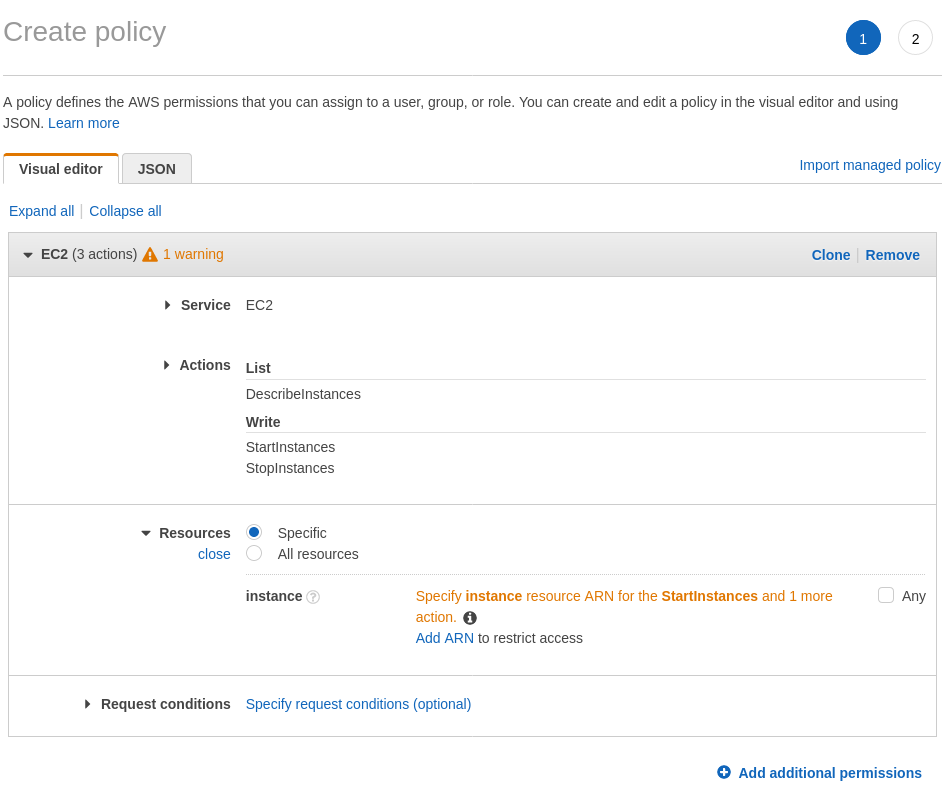
Selecting the service you want (EC2) you can set which actions are allowed on this
policy, I know I will want to StopInstances, StartInstances, as well as
DescribeInstances so using the search bar in the actions section I select
those actions.
The last thing you need is which ARN (Amazon Resource Name) you want this policy to affect. You could let this policy affect every instance you’ve got but I decided to click “Add ARN” to limit it to the VPN instance. It’s better to limit the scope of policies anyway.

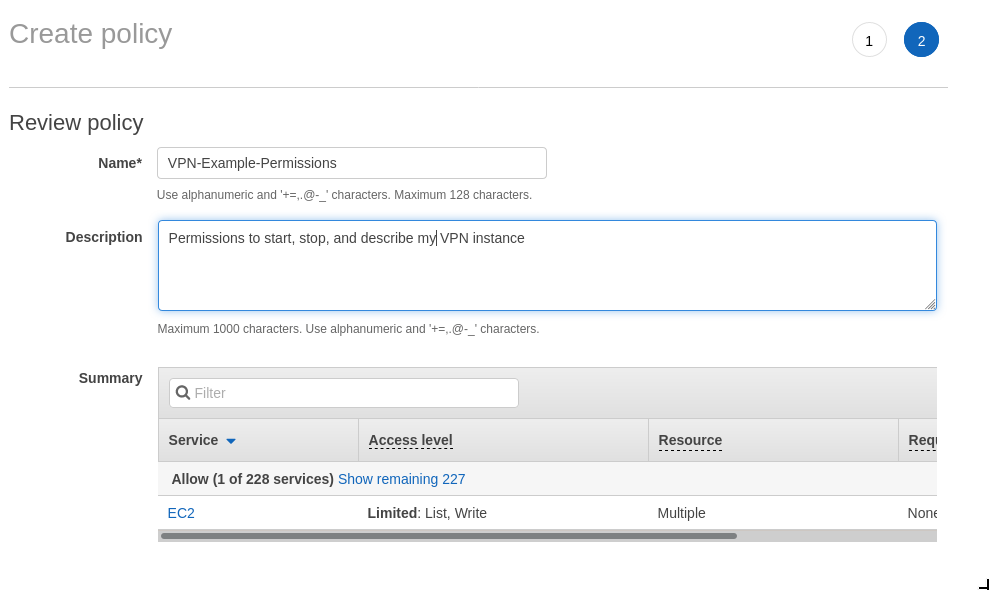
Once that’s done, click “Add” to add it to the policy then click “Review policy”. Give the policy a punchy name and a description that makes sense then create that bad boy.
With the policy now created it’s just a matter of going back to the tab with the user creation flow that we left to create the group policy and search for the new policy. Give the group a name that makes sense and smash the “Create group” button.

getting the secrets
With the new user added to the group with the new permissions, click onto the next step where you can add tags to the user if you like, otherwise head on to the next screen to review the new user.
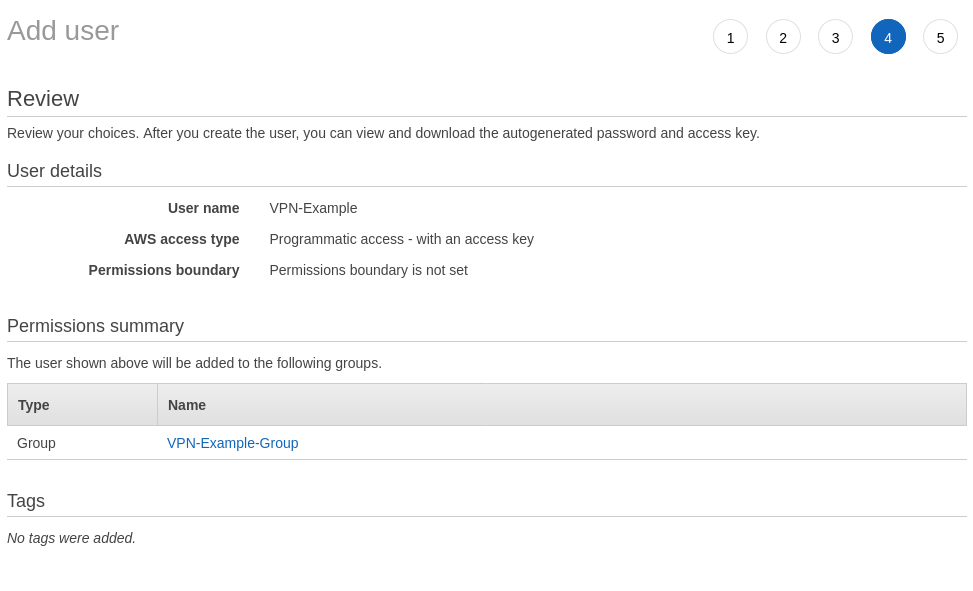
If all looks in order then click to create the user and the final screen you are presented with is a success screen (hopefully) and the Access key ID and Secret access key for the new user. These two keys are what the AWS CLI needs in order to do its thing, so make a note of them.

Now a user exists that has programmatic access to AWS and permission to start, stop, and describe the EC2 VPN instance. Perfect.
AWS CLI
As previously mentioned the script I wrote relies heavily on the AWS CLI, and
the AWS CLI needs some credentials in order to do its thing. It expects an
environment variable called AWS_PROFILE to be set, and the value of that
variable tells AWS CLI what profile credentials to use when sending requests.
Now that we have the Access key ID and the Secret access key of the new user, we
need to store them in ~/.aws/credentials. This is the file the AWS CLI looks
at with the value of AWS_PROFILE to find credentials. Create the file if
doesn’t already exist and add your keys to it, it should look like this.
[VPN]
aws_access_key_id=<your-key-id>
aws_secret_access_key=<your-secret-access-key>
region=<whatever-aws-region-you-use>
The [VPN] is the name of the profile, this is to help distinguish between
other AWS profiles you might have, e.g. Work Production, Work Staging, Personal
etc. My script assumes there is an AWS
profile called VPN however feel free to call it whatever you like (or perhaps
you added permissions to an already existing user), if you export an environment
variable called AWS_VPN_PROFILE with the name of your profile then the script
will use that instead.
With all of this in place we can now use the AWS CLI to play with the EC2 VPN
instance. If you issue this command AWS_PROFILE=VPN aws ec2 describe-instances
--instance-ids <instance-id> you should get back a big blob of JSON with
information about your instance.
ovpn file
The only other thing needed for my
script to work is the ovpn file that
was generated when setting up the EC2 instance. The script takes the ovpn file
and generates a template it can use to create a working ovpn file with the new
public IP address of your instance and connect to the instance with OpenVPN.
The README has all the details to help you get things set up.
how the script works
Getting AWS permissions and credentials is the meat of the set up for the
script, everything else I’ve written in my
script just wraps the AWS CLI. I’ve made
use of jq to handle parsing the JSON and of course OpnVPN is used to connect
to the instance.
To start, the script needs to know the instance ID of the VPN, running ec2-vpn
update <instance-id> will pull down information for that instance and store it
in a dot file for later use. This file is then referenced by all the other
commands, running ec2-vpn update without the ID will pull information on the
instance it finds in the dot file created before. If you want to use another instance
later just run the update command again with the new instance ID to start using
the new instance instead.
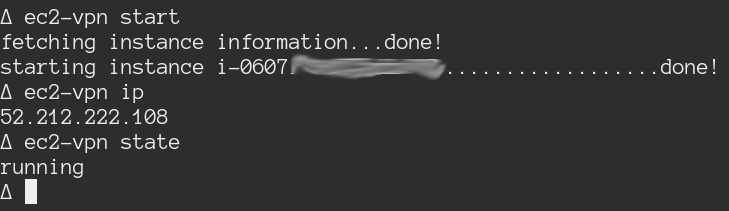
Now, instead of having to leave my terminal to spin up my EC2 instance I just
need to run this command ec2-vpn start, and the script does all the work for
me. Including filling in the public IP address of the instance in an ovpn
file, which will be used to connect to the VPN.
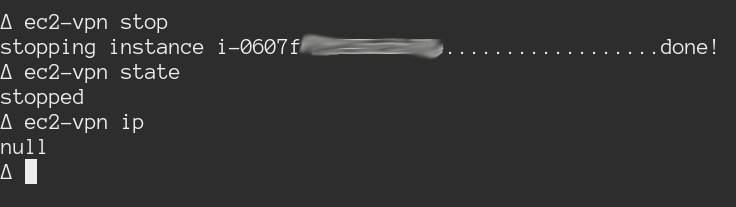
Stopping it is just as easy.
Using the start and stop command is fine for starting and stopping, but what
about connecting to the VPN?
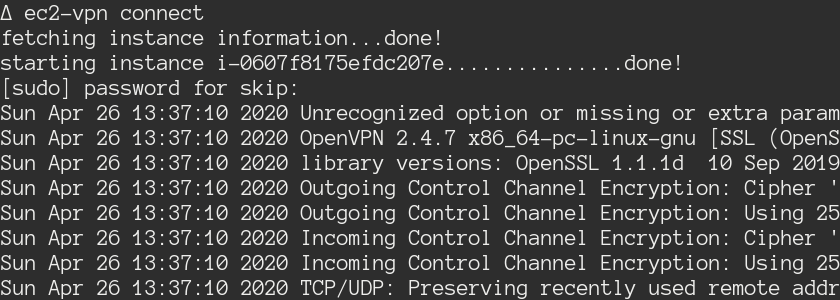
Easy, ec2-vpn connect will start the instance (unless already running) and
connect to it. The rest of the output is from openvpn.
If we issue some sort of interrupt, using control-c for example, then this will
be caught in the script using trap and you will be disconnected from the VPN
and your EC2 instance torn down.
I’ve highlighted ^C so you can see that’s exactly what I’ve done here.

lazy fuck
So there we have it, a script that admittedly requires a bit of set up but one that takes all the hassle out of spinning up your EC2 instance and connecting to it.
Without this script I would need to:
- Log into AWS
- Navigate to the EC2 panel
- Start our instance
- Take the new public IP and insert it into the
ovpnfile - Connect to the instance with
openvpn - Do some browsing
- Go back to AWS to stop the instance when I am done
Then repeat the above any time I want to use my VPN.
Fuck that.